
Hiwatt DIY
Last updated February 10, 2009

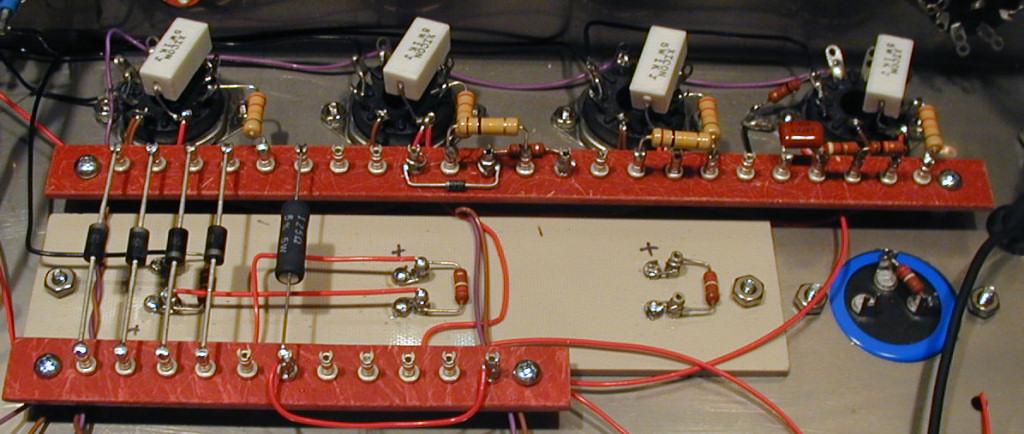
Note the "shorty" snap-in caps.
This page documents the details of my efforts to build a '103 from currently available parts.
I'm strongly of the opinion that if Dave Reeves were still alive and building amplifiers that he would use the best possible components currently available at reasonable cost. Therefore, I did not slavishly chase down vintage "mustard" caps, etc. Rather, I used flameproof ceramic or metal film resistors for the power supply, Mallory 150 caps, and so on.
I made a couple of practical changes to the original circuit:
- I put in an adjustable bias circuit.
- I used 1k 5w screen resistors.
Here's a Bill of Materials for all the components for an original (unchanged) 103. It does not include the chassis, transformers, or wire.
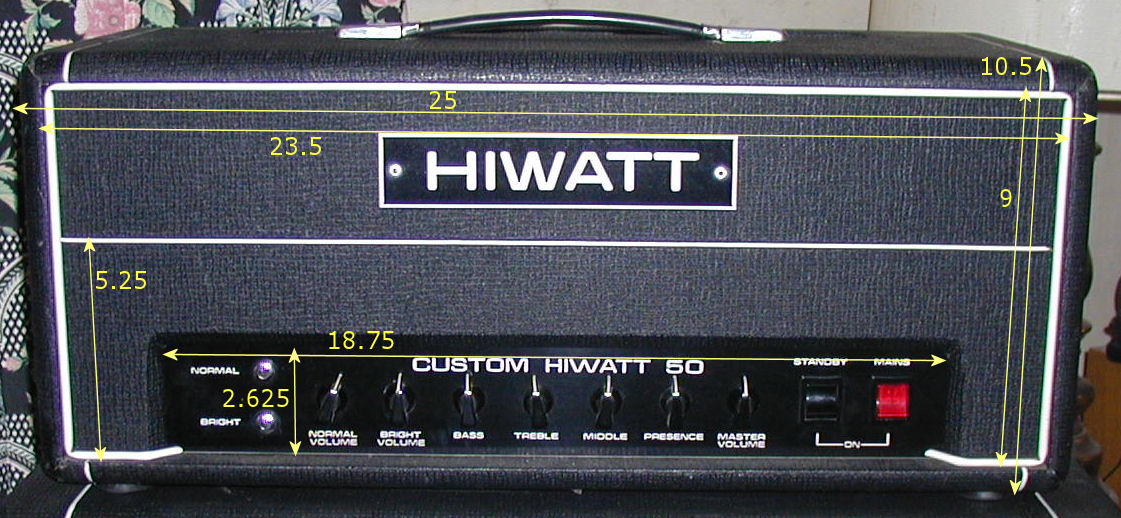
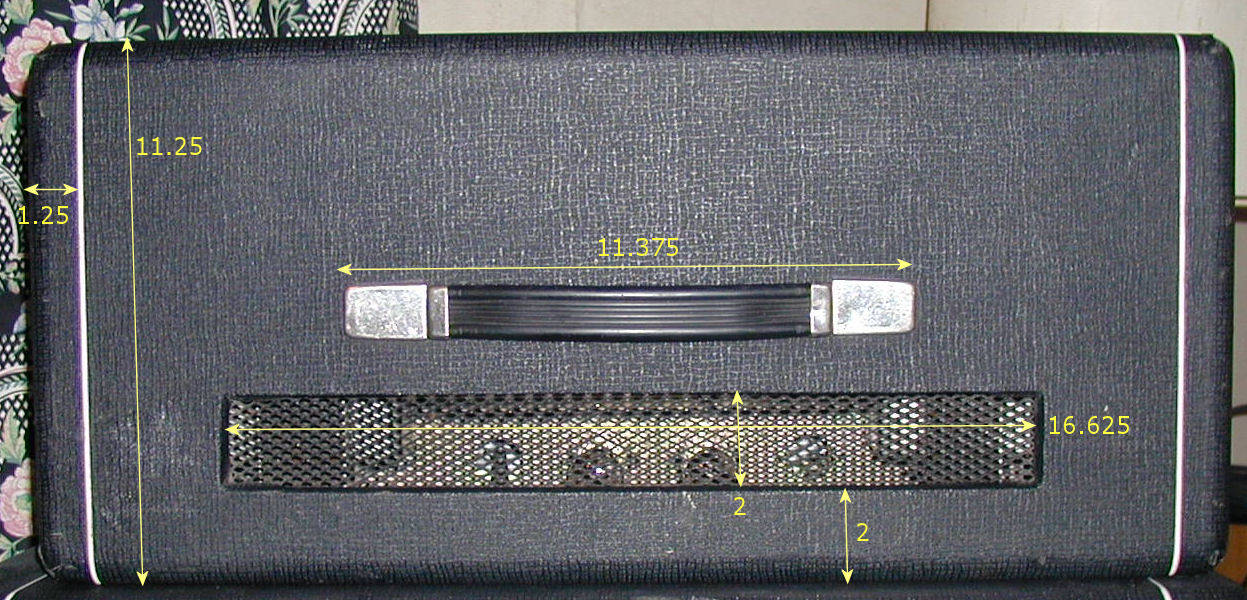
The Head Cabinet
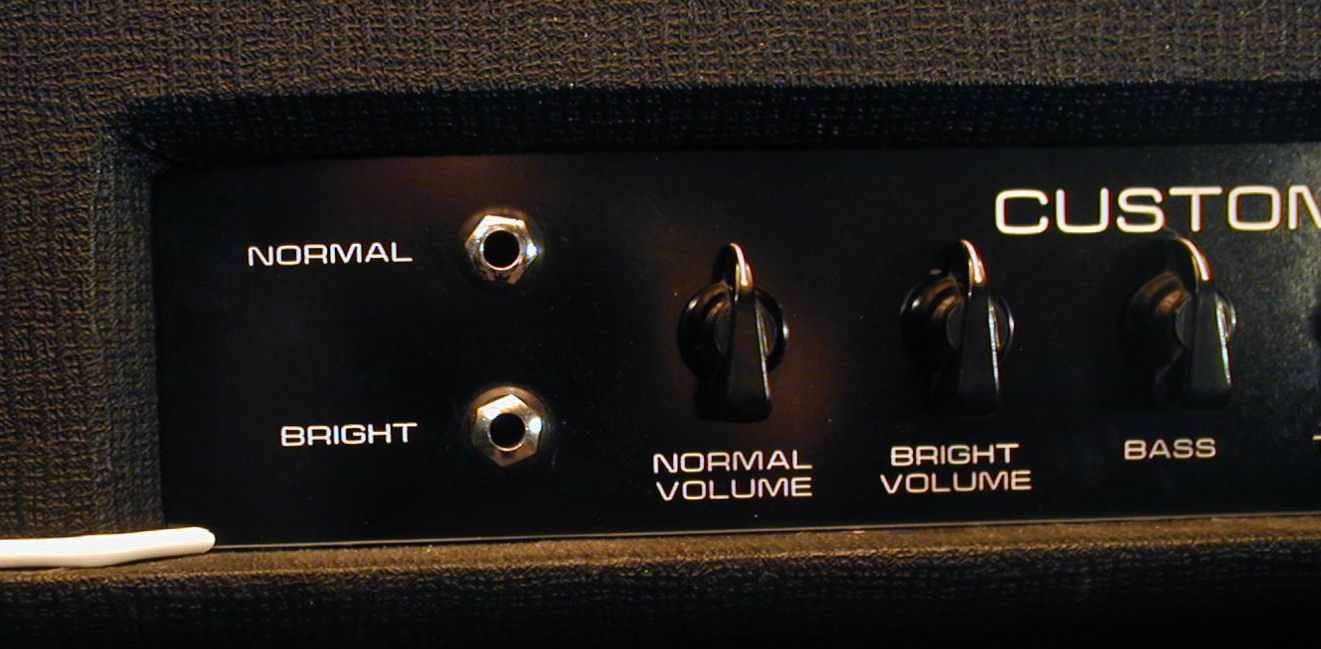
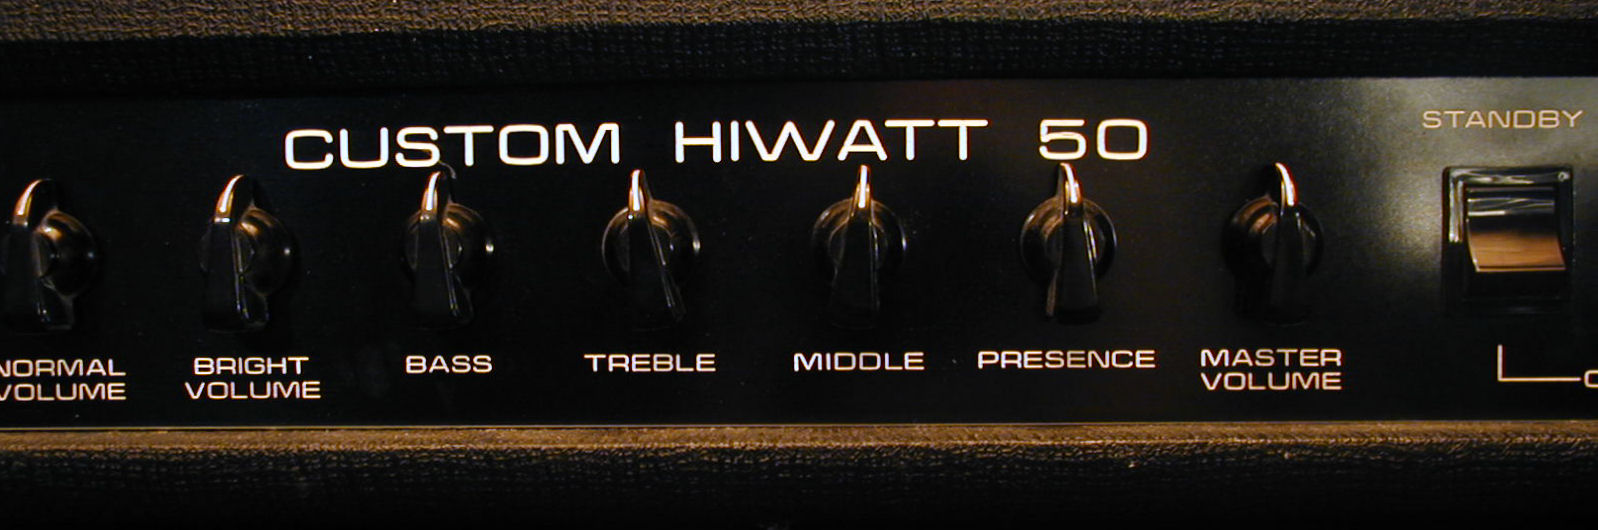
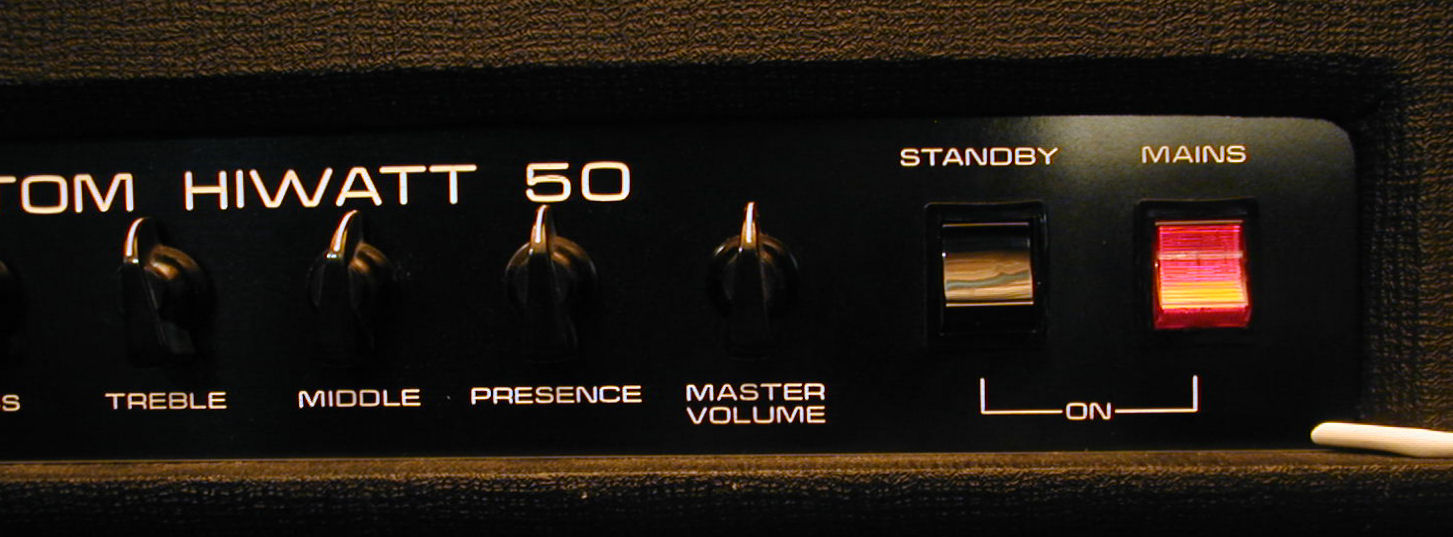
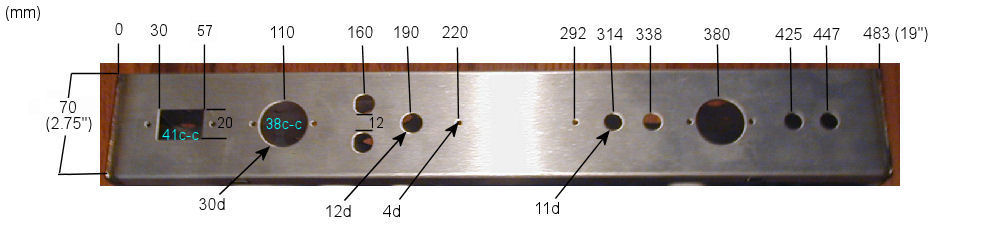
Front Panel Details
Cabinet Details
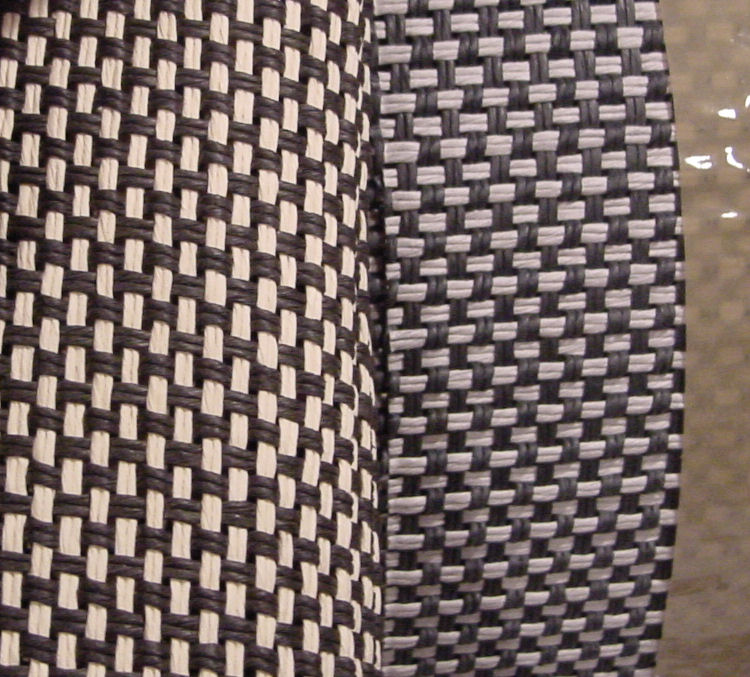
- This picture shows the difference between the normal Marshall "salt & pepper" grille cloth widely available and the Hiwatt gray & dark blue cloth. (Courtesy of Jeff Swanson).
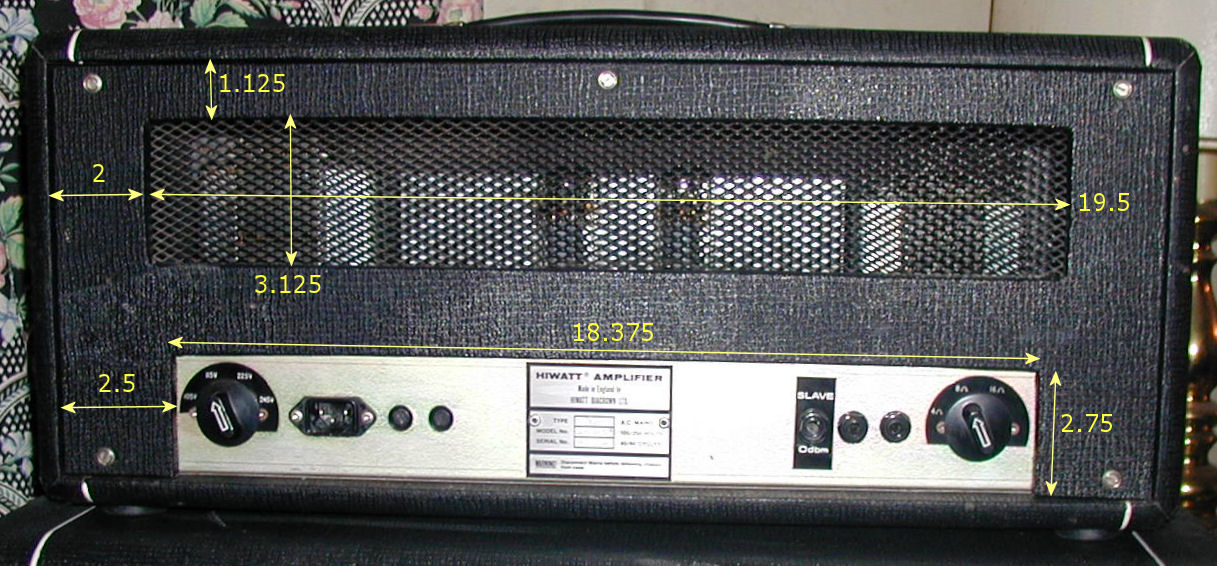
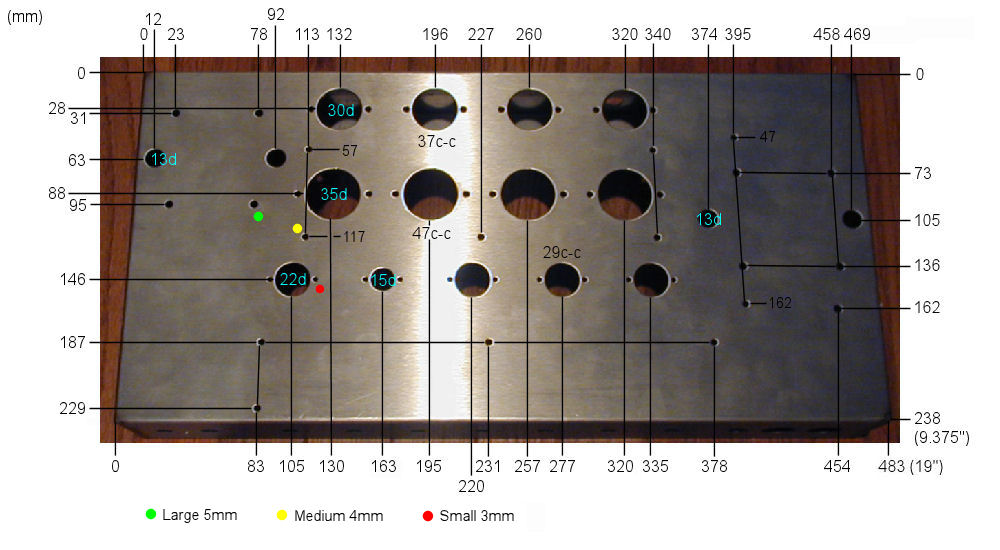
The Chassis
This stainless steel one-off came from the UK via my friend Jeff Swanson. Here's the five way input jack cutouts from my Biacrown. This supports standard two-hole, four-hole, "LEAD" or "S" type inputs.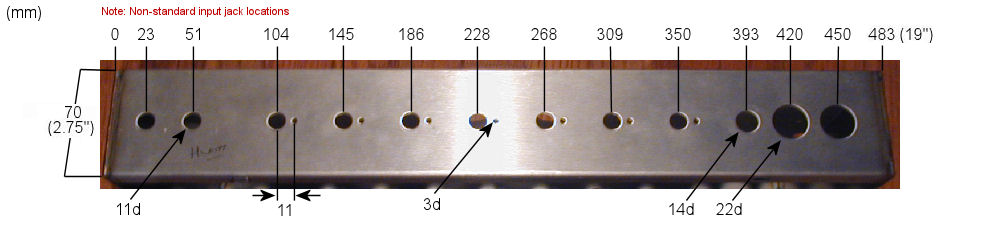
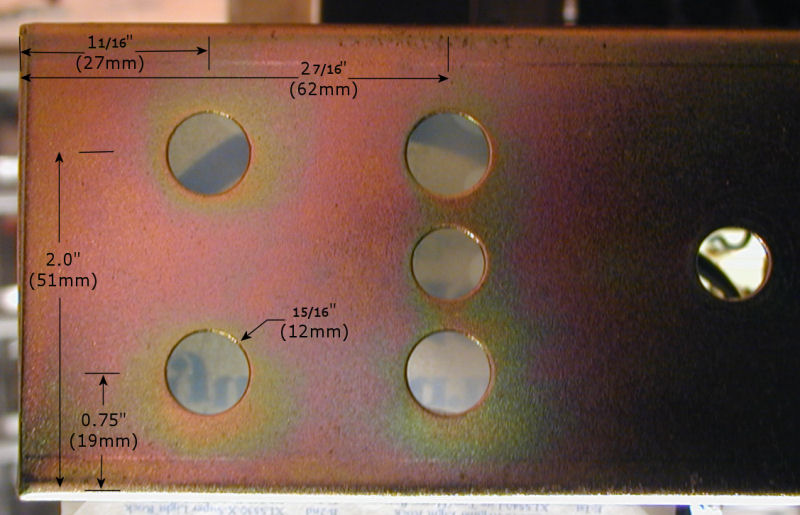
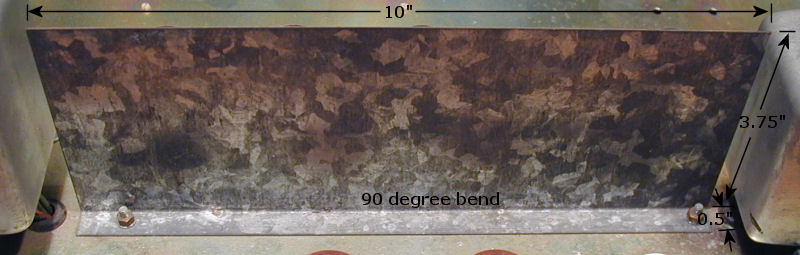
The Heat Shield
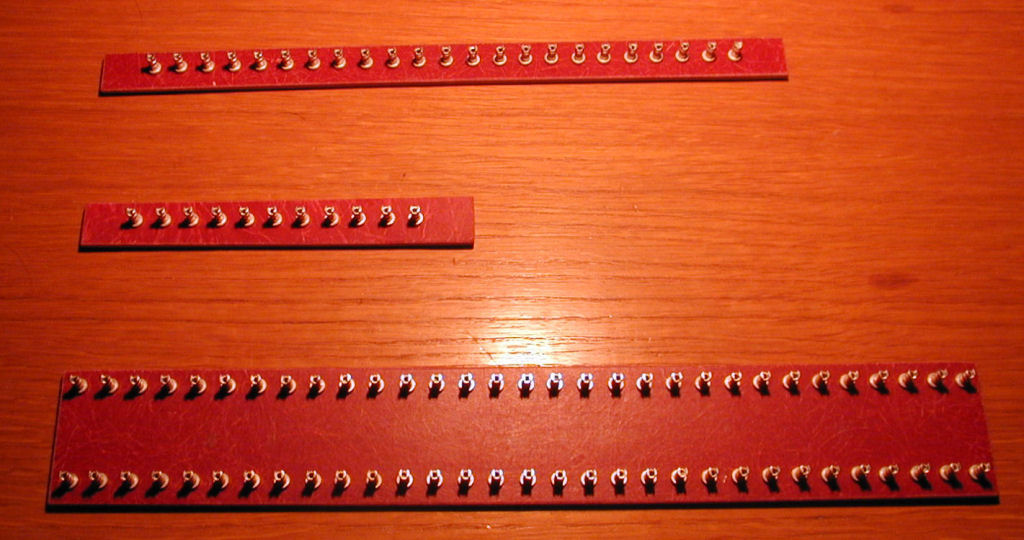
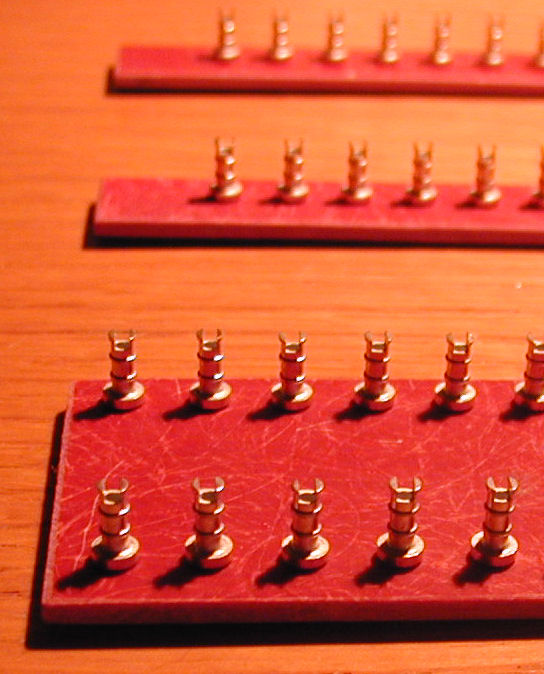
The Turret Boards
The boards were made for me by Ray Domzalski.
The Transformers
These were made by Phil at Heyboer Transformers in Michigan, USA.
- HTS-5912 Output Transformer
- HTS-8206 Power Transformer
- Closeup of the M27 PT lam stack
The PT is just like the original DR103 transformer except (1) it is 120VAC input only and (2) the bias winding has a bit more voltage, so that no fancy bias circuitry will be needed!
Note that the Partridge-style flanges cost extra, they are strictly cosmetic and have no effect on the sound, but I like that traditional look. :-)
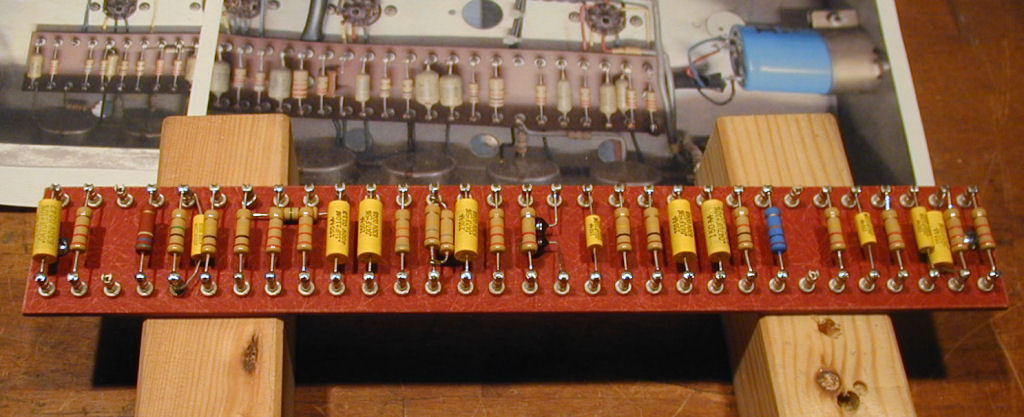
Work in Progress
- Populated preamp board, using two watt carbon film resistors, and Mallory 150 film caps.
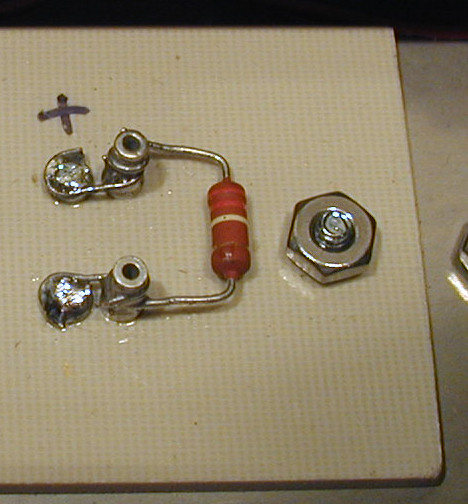
- Detail of snap-in cap mounting. These caps are inexpensive, high quality, and rated at 105 degrees C, but come in an odd (1.125") diameter, which is a difficult size to find clamps in. I made up a combined eyelet/turret board to hold these, eyelets to solder the caps into and turrets to connect wires and resistors to. I also rearranged the four filter caps, putting the 2x50 on the end.
- Here a shot of the power section in progress.
Almost Complete
The front panel was done for me by Dave at DKgrafix in L.A. He can be reached on the Plexi Palace board as 'DFX.'- The front view
- The front interior
- The back interior
Done!
Samples
These were made using a Schecter C-1 Classic straight in to the Normal channel, Normal jumped to Brill (a la Marshall), all controls at 12:00. The amp was fed through a HotPlate set to -8 and into a Swanson 2x12 "Hylight style" cab with the re-issue Fanes in it.
This was recorded in a medium large semi-live basement using an MXL large-diaphragm condenser set about 10 feet/ 3 meters away from the cab directly into my Fostex MR-8HD Digital Multitracker.
I extend the usual apologies about the sloppy playing! ;-)
New July 2006: KT77 clipsDIY Efforts of Others
Chedomir J. has done an original twist or two on the Hiwatt idea, including using toroidal transformers. He has a page about it here.
Here's a take on the 504 "LEAD" by David C. Note that he intentionally did not attempt to exactly duplicate the outward appearance -- To quote David, "because I want 'the sound,' but don't want it to be mistaken for the genuine thing. I try to honor the spirit of it without copying exactly."
Voltage table from Bill L's Home-built DR201
| DC voltages for the 9 pin pre amp tubes | ||||
| Tube Type -> | ECC83 | ECC83 | ECC83 | CV4024 |
| Pin | V1 | V2 | V3 | V4 |
| 1 | 149 | 0 | 281 | 258 |
| 2 | 0 | 0 | 65.9 | 71.8 |
| 3 | 1.32 | 0 | 71.2 | 74.9 |
| 6 | 145 | 185 | 189 | 265 |
| 7 | 0 | 0 | 0 | 62.3 |
| 8 | 1.39 | 1.29 | 1.79 | 74.8 |
| DC voltages for the 8 pin power tubes | ||||
| Tube Type -> | KT 88 | KT 88 | KT 88 | KT 88 |
| Pin | V7 | V8 | V9 | V10 |
| 3 | 649 | 649 | 649 | 649 |
| 4 | 400 | 400 | 400 | 400 |
| 5 | -50 | -50 | -50 | -50 |
| 8 | .003 | .003 | .003 | .003 |
Main Hiwatt Page
MHuss Home