A Mod for the Fender Blues Jr.
meh 1/2006| Previous | Next |
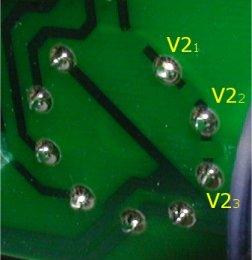
- Make four (4) cuts on the Tube PCB as shown, disconnecting V1 pin 1 ands V2
pins 1, 2, and 3 from their original connections. The pins are numbered
clockwise from top right as you look at the PCB.
V1 PCB Trace Cut V2 PCB Trace Cuts 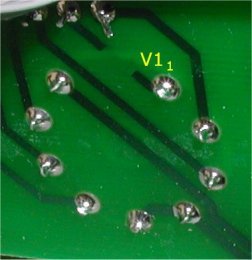
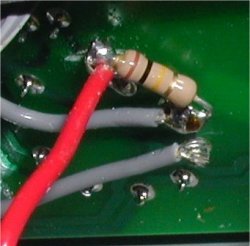
- Carefully cut out the body of R10 as close as possible to the body itself
(to maximize the remaining lead stubs for soldering to). Solder a 100K
resistor from the cut off left lead stub to the bottom (GND) of R11. This will
become our new cathode follower load resistor. The left side of R10 was
already connected to the tone stack. Cut the right-hand stub off flush with
the circuit board, as it is no longer needed.
Before After 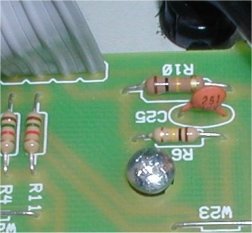

- Solder a wire from V1 Pin1 to V2 Pin 2. This connects the output of V1A to
the input of V2A.
- Solder a wire from V2 Pin 3 to the PCB trace on the tube PCB that V1 Pin 1
was originally connected to. This connects the PCB 100K resistor to the
cathode of V2.
V1 Wired V2 Wired 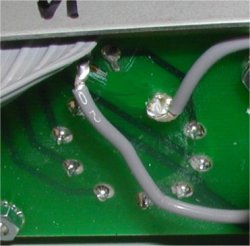
- Solder a 100K 1/2 w resistor from V2 Pin 2 to V2 Pin 1. This is the new
plate load resistor for V1A that replaces R10. Make sure the resistor leads
don't touch anything they shouldn't!
- Using a thin blade, slightly pry up wire jumper W23, and solder a wire
from there to V2 Pin 1. This provides B+ to the new cathode follower (V2A)
and V1A.
Main PCB Wired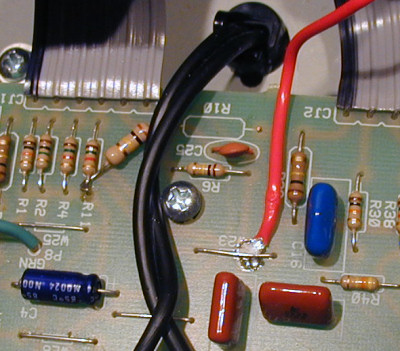
With a continuity tester, make sure:
- V2 Pin 1 connects to the top of the B+ "Z" filter cap (C10).
- V2 Pin 2 connects to V1 Pin 1
- V2 Pin 3 connects to the "tone stack" end of R10'.
- the other end of R10' connects to ground.
- none of these four points connect to any of the others!
Overall View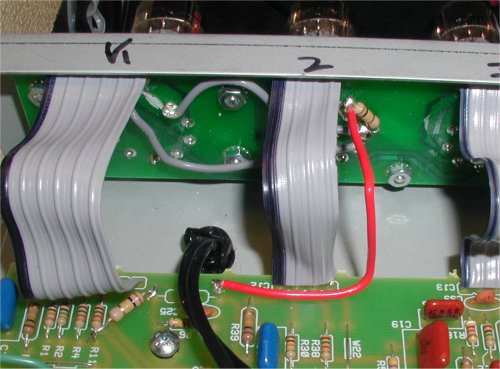
Note: This view shows the red B+ wire in the old position on the main PCB, which turned out to be unreliable.
Fire it up and see what it sounds like!
Notes: I used carbon film resistors just because I had some on hand. Use wire rated for 300V or better. 22 gauge wire might be easier to work with than the 18 gauge teflon-insulated wire I used here.
| Previous | Next |